Discover the captivating world of art resin‚ a versatile medium offering endless creative possibilities․ Perfect for both hobbyists and professionals‚ it allows crafting stunning‚ durable pieces with a glossy finish‚ making it an exciting choice for artistic expression and DIY projects․
What is Art Resin?
Art resin is a versatile medium made from a combination of liquid resin and hardener․ When mixed together‚ these components undergo a chemical reaction‚ curing into a durable‚ glossy finish․ It is widely used in artistic projects‚ DIY crafts‚ and home decor due to its clarity‚ strength‚ and UV resistance․ Art resin is ideal for creating decorative items like jewelry‚ coasters‚ and paintings‚ as well as protective coatings for surfaces․ Its fluidity allows for unique effects‚ such as marbling and layering‚ making it a favorite among both professionals and hobbyists․ Understanding the basics of art resin is essential for mastering its creative potential and ensuring successful project outcomes․ Always follow the manufacturer’s instructions for proper mixing ratios and safety precautions to achieve the best results․
Benefits of Using Art Resin
- Art resin offers a durable and glossy finish‚ making it ideal for creating long-lasting pieces․
- It is highly versatile‚ suitable for various projects‚ from jewelry and coasters to paintings and decorative items․
- The medium is easy to work with‚ allowing for unique effects like marbling and layering․
- Art resin is UV-resistant‚ preventing yellowing and ensuring colors remain vibrant over time․
- It is a great choice for both beginners and professionals‚ offering forgiving properties for creative experimentation․
- Resin can be mixed with pigments‚ glitters‚ and other decorative elements for customizable results․
- Its clear finish enhances the visibility of embedded objects‚ making it perfect for encapsulating flowers‚ leaves‚ and other materials․
- Art resin projects can be completed relatively quickly‚ with most curing within 24 hours․
- It provides a professional-looking finish‚ elevating handmade crafts to stunning works of art․
Brief History of Resin Art
Resin art has evolved significantly over the decades‚ transitioning from industrial applications to a popular medium for artistic expression․ The use of epoxy resin‚ in particular‚ gained traction in the 1960s as artists began experimenting with its versatile properties․ Its durability and glossy finish made it an attractive choice for creating modern‚ sleek designs․ Over time‚ advancements in resin formulations‚ such as the introduction of UV-resistant and low-odor options‚ expanded its creative potential․ The rise of social media further propelled its popularity‚ as artists shared stunning resin creations‚ inspiring a global community․ Today‚ resin art is celebrated for its ability to blend chemistry and creativity‚ offering endless possibilities for crafters and professionals alike․ Its history reflects a journey from practical use to artistic innovation‚ making it a cornerstone of contemporary art and DIY culture․

Materials and Supplies Needed
Gather essential materials like epoxy resin kits‚ silicone molds‚ measuring cups‚ stir sticks‚ and personal protective equipment․ Quality tools ensure successful‚ safe‚ and professional-looking resin art projects․
Essential Materials for Resin Art
Starting your resin art journey requires gathering the right materials to ensure success․ A high-quality epoxy resin kit is the foundation‚ typically including resin and hardener․ These components mix to create a durable‚ glossy finish․ Silicone molds are ideal for shaping your artwork‚ whether for jewelry‚ coasters‚ or decorative pieces․ Measuring cups or a digital scale are crucial for accurate mixing ratios‚ usually 1:1 for resin and hardener․ Stir sticks or mixing tools help blend the components thoroughly․ Personal protective equipment (PPE) like disposable gloves and safety goggles is essential to protect against skin and eye irritation․ A well-ventilated workspace and a heat gun or torch for removing bubbles are also recommended․ Optional decorative elements such as pigments‚ glitter‚ or dried flowers can add personal touches to your creations․ Having all these materials ready ensures a smooth‚ safe‚ and creative process․
Choosing the Right Resin for Your Project
Selecting the appropriate resin for your art project is crucial for achieving desired results․ Epoxy resin is a top choice for beginners due to its ease of use‚ low odor‚ and 24-hour curing time․ It’s versatile‚ making it ideal for crafting jewelry‚ coasters‚ and decorative pieces․ For advanced projects‚ polyurethane resin offers a quick cure but is more sensitive to moisture‚ requiring careful handling․ Polyester resin is durable and suitable for projects needing extensive sanding but has a stronger odor․ Consider brands like ArtResin for UV resistance and Pro Marine Supplies for glossy finishes․ Always check for safety certifications and non-toxic labels‚ especially for items that will be touched frequently․ Opt for resins with longer working times (30 minutes to an hour) for a stress-free creative process․ Prioritize your project’s needs and resin properties to make the best choice․
Importance of Personal Protective Equipment (PPE)
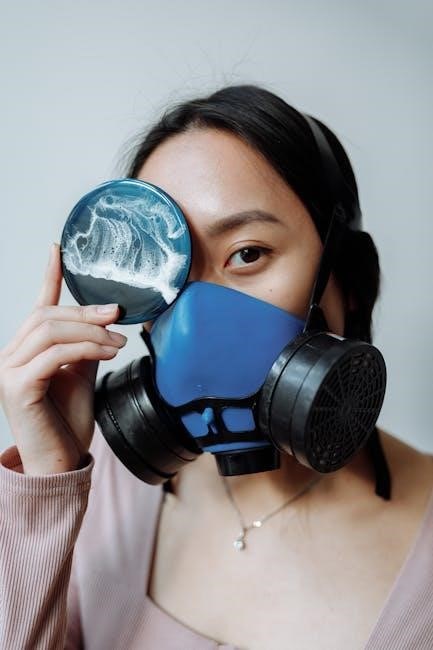
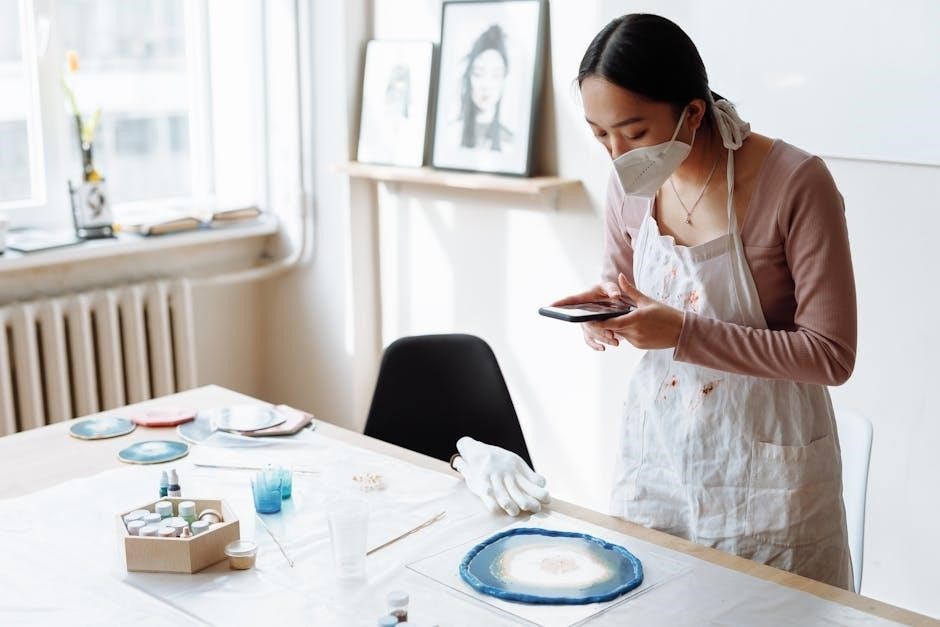
When working with art resin‚ wearing Personal Protective Equipment (PPE) is essential to ensure safety and prevent potential health risks․ Chemicals in resin can cause skin irritation or allergic reactions‚ making gloves a must․ Opt for nitrile gloves for better protection․ Safety goggles or glasses are crucial to protect your eyes from splashes․ A ventilated mask or respirator is also recommended to minimize inhalation of fumes; Long sleeves and protective clothing can prevent skin exposure․ Always work in a well-ventilated area to reduce the concentration of fumes․ Proper PPE ensures a safe and enjoyable creative process‚ allowing you to focus on crafting stunning resin art without compromising your well-being․ Remember‚ safety should never be overlooked when handling resin and hardeners․
Workspace Preparation
Setting up a well-ventilated workspace is crucial for resin projects․ Cover surfaces with plastic or parchment paper to prevent spills․ Organize tools and materials for easy access․
Setting Up a Well-Ventilated Workspace
Setting up a well-ventilated workspace is essential for safe and successful resin art projects․ Epoxy resin emits strong fumes that can be harmful if inhaled‚ so working in a well-ventilated area is crucial․ Open windows‚ use fans‚ or work near vents to ensure good airflow․ Avoid basements or enclosed spaces without proper ventilation․ Cover your work surface with plastic or parchment paper to protect it from spills and make cleanup easier․ A flat‚ stable surface is also important to prevent resin from pooling unevenly․ Keep all materials within easy reach to streamline your workflow․ Proper ventilation not only enhances safety but also prevents fumes from interfering with the curing process․ Always prioritize your health and workspace safety when working with resin․
Protecting Your Work Surface
Protecting your work surface is crucial when working with art resin to prevent damage from spills and ensure easy cleanup․ Cover your workspace with plastic sheets‚ parchment paper‚ or silicone mats‚ as these materials are resistant to resin and can be easily disposed of or cleaned․ Resin can permanently bond to surfaces like wood or fabric‚ so proper protection is essential․ For added convenience‚ use a disposable tablecloth or drop cloth to catch any accidental drips․ If you’re working on a project that requires precision‚ consider using a silicone mat with measurements to help you pour accurately․ Proper surface protection not only saves time but also prevents costly damage․ Always ensure your work area is clean and dry before starting your project to avoid any residue interfering with the resin․ This step is vital for achieving professional-looking results and maintaining your tools and workspace․
Mixing and Applying Resin
Mixing and applying resin involves precise techniques to achieve desired effects․ Stir slowly to avoid bubbles‚ ensuring a smooth pour; Follow instructions for ratios and pouring methods to create stunning results․
Step-by-Step Guide to Mixing Resin
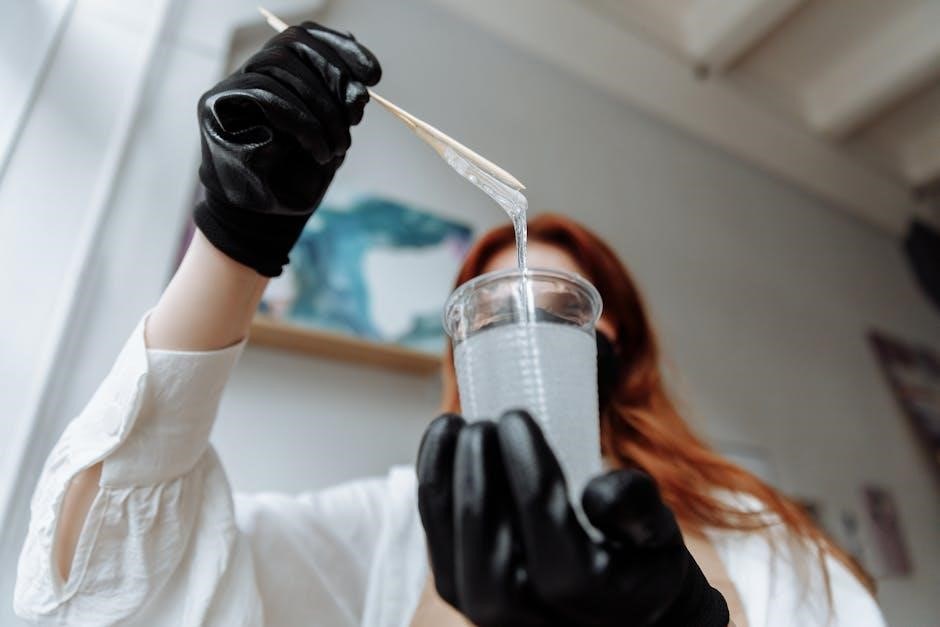
Mixing resin requires precision to ensure proper curing and a professional finish․ Start by gathering your materials‚ including resin‚ hardener‚ measuring cups‚ and a stir stick․ Always follow the manufacturer’s instructions for the correct ratio‚ typically 1:1 for epoxy resin․ Pour equal parts of resin and hardener into a mixing cup․ Stir slowly and consistently for 3-5 minutes to avoid introducing air bubbles․ Scrape the sides and bottom of the cup to ensure a thorough mix․ Once fully blended‚ allow the mixture to sit for a minute to eliminate any remaining bubbles․ Avoid rushing this step‚ as an improperly mixed resin will not cure correctly․ Use the mixture immediately‚ as the curing process begins once the components are combined․ Always work in a well-ventilated area and wear protective gear for safety․
Adding Pigments and Decorative Elements
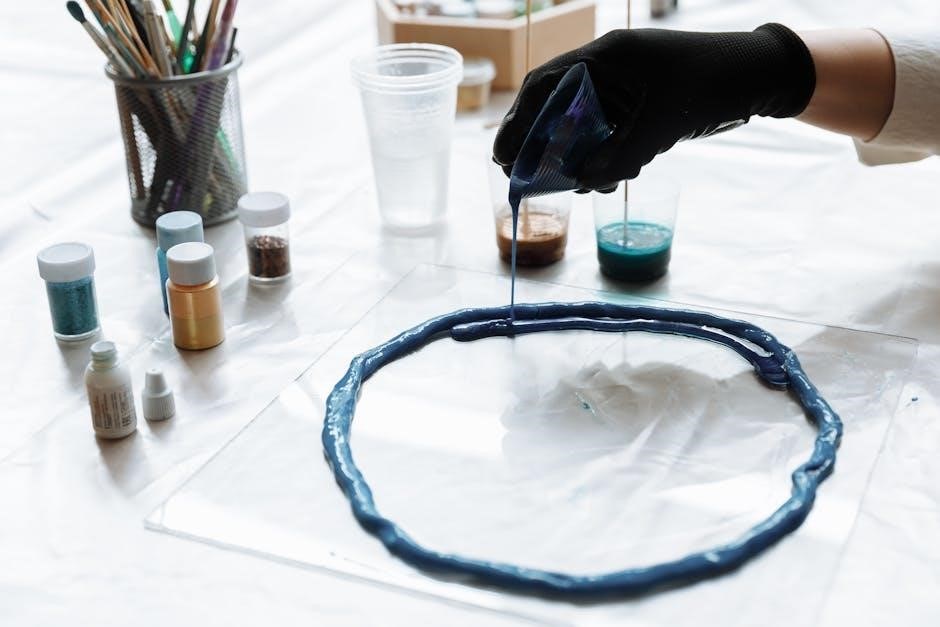
Enhance your resin art by incorporating pigments and decorative elements for unique‚ eye-catching designs․ Start by preparing your resin mixture‚ then gradually add pigments like liquid dyes‚ powder pigments‚ or metallic powders․ Mix thoroughly to ensure even color distribution․ For decorative elements‚ gently fold in items such as dried flowers‚ glitter‚ or small beads to avoid creating air bubbles; Experiment with layering elements or creating marbling effects for added visual interest․ When adding heavier materials like coins or stones‚ ensure they are fully submerged to prevent sinking or uneven curing․ Always test a small batch first to ensure pigments and elements blend seamlessly with the resin․ This step allows for endless creativity‚ making your piece truly personalized and distinctive․ Remember to wear gloves and work in a well-ventilated area to handle materials safely․
Pouring Techniques for Different Effects
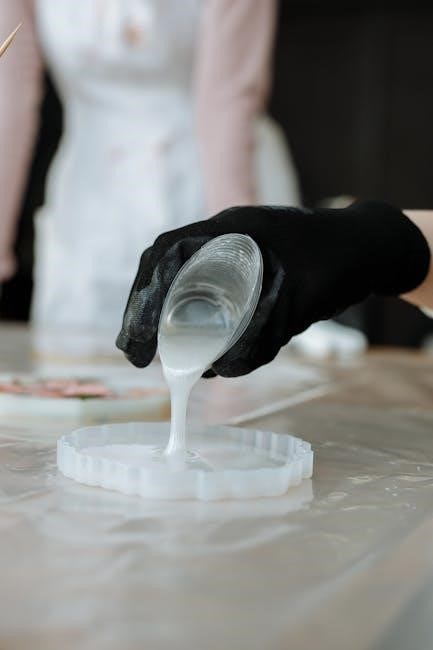
Mastering various pouring techniques can elevate your resin art‚ creating unique and visually striking effects․ Start with a slow‚ controlled pour to fill your mold evenly․ For a marbled effect‚ gently tilt the mold or use a heat gun to manipulate the flow․ Layering resin in different colors or consistencies can add depth and texture․ Experiment with techniques like the “dutch pour‚” where resin is drizzled in circular motions‚ or the “swipe” method‚ dragging a tool through the mixture for intricate patterns․ To achieve a smooth‚ glass-like finish‚ pour in a single‚ steady stream․ Always work in a ventilated area and wear protective gear‚ including gloves and goggles‚ to ensure safety․ These techniques allow you to explore endless creative possibilities‚ making each piece truly one-of-a-kind․ Practice and experimentation will help refine your skills and unlock new artistic expressions․
Curing and Finishing
Allow the resin to cure in a warm‚ dry environment‚ typically taking 24 hours․ Sand lightly to smooth edges‚ then polish for a glossy finish‚ enhancing durability and appearance․
Understanding the Curing Process
The curing process is a critical phase where the resin transforms from a liquid to a solid state‚ creating a durable and glossy finish․ This process typically takes around 24 hours‚ depending on environmental factors like temperature and humidity․ Ensure the piece is placed in a warm‚ dry‚ and well-ventilated area to avoid moisture interference․ The resin mixture undergoes a chemical reaction‚ hardening over time․ It’s essential to avoid touching or moving the piece during this period‚ as it can cause imperfections․ Some resins may require a shorter curing time‚ while others might need longer․ Always follow the manufacturer’s instructions for specific guidelines․ Proper curing ensures the resin reaches its full strength and clarity‚ making it resistant to scratches and damage․ Avoid exposing the piece to direct sunlight during curing‚ as it can cause uneven hardening or yellowing over time․ Once cured‚ the surface will be hard and ready for sanding or polishing․ Patience is key‚ as rushing the curing process can lead to a tacky or incomplete finish․ Understanding and respecting the curing timeline ensures a professional and long-lasting result‚ whether you’re creating art‚ jewelry‚ or decorative items․ This step is both a scientific process and an artistic patience‚ blending chemistry with creativity to achieve stunning outcomes․
Sanding and Polishing Your Final Piece
Sanding and polishing are essential steps to achieve a smooth‚ glossy finish for your resin art․ Start by allowing the resin to cure completely‚ typically 24 hours‚ as per the manufacturer’s instructions․ Once cured‚ begin sanding with a coarse grit sandpaper (120-150 grit) to remove any imperfections such as bubbles or bumps․ Use a wet sanding technique with water to minimize dust and improve sanding efficiency․ Progress through finer grits (220‚ 320‚ 600‚ 800) to ensure a smooth surface‚ wiping away dust between each grit change to maintain clarity․
After sanding‚ polish the piece using a polishing compound or a homemade alternative like toothpaste․ Apply the compound with a soft cloth in circular motions‚ buffing until the surface shines․ For added protection‚ consider applying a wax or specialized resin polish to maintain glossiness and protect against dust and minor scratches․
Work in a clean environment and wear gloves to prevent fingerprints․ Avoid common mistakes like insufficient sanding or skipping grits‚ which can leave scratches․ Be cautious with water usage to prevent weakening the resin․ Patience and meticulous attention to detail are crucial to achieve a professional‚ long-lasting finish․